Monday, December 31, 2012

Last update for 2012!

Here it is the 31st of December and I am still working on some custom models for clients. A funeral home is half done and a farm house will be started after the former is finished. Then I can start on The Last Resort! The pieces sit out in the garage just patiently waiting for my return.

I have loads of photos of the funeral home and will publish a few here when it is finished. It is a Victorian house that has been repurposed for commercial use and has not seen much upkeep in the past 20 or so years.

The article on the Balsa-Foam Welcome Center has been published in American Miniaturist's January 2013 issue. The follow-up painting article will be in the next issue in February. As soon as I finish the funeral home I will complete the remaining few touches needed for the first volume of the Grande Barbosa Island Railway book: chapter one. Just a few days of work left, but trying to fit it in is a little rough, especially over the holidays. The above photos shows some of the rock work and basic dock adjacent to it. It still need the old tires and other rope lashings attached. This will be the first finished piece attached to the island when the base is ready after the basic roadbed and rock work base has been placed. Days and days of making rocks will ensue with holes for bridges and little trestles here and there. But that must wait a while yet.

I hope this new years brings everybody on this blog good will and some progress on the financial end as well. 

Friday, November 30, 2012

An update at last!

I have been so busy on other projects that I haven't had much time to devote to The Last Resort in some time. I do have the two 24" doors upon which I will build the island and the garage is cleaned out enough to start work. It will need to await the coming of the new year though.

I am working on models for customers at the moment: a Model A in 1/24 scale and two 1/4" structures, the farm house/bordello and the Crestfallen Funeral Home. Lots of patterns need to be built for the two structures and I am closing in on the last ones. I am know casting enough parts to have a stockpile ready soon.

The Vertical Boiler Teakettle is now ready for release. Those can be ordered direct from me if anybody is interested. It is an all resin kit and the builder must supply some needed styrene and Plastruct pipe angles in order to complete. A photo is shown here. It uses the Bachmann On30 Davenport as a starting point. This is the locomotive that will be used on the little island resort.

I wish I could start on the island, however, I must finish the custom work first. The first chapter of the Grande Barbosa book should be ready soon. I have a few last sketches to do and shoot the little boat before it can be put together and printed.

That's it for now. The casting room is calling...

Wednesday, August 29, 2012

The Last Resort

Here is a sketch of the layout for the model. The base has grown slightly to almost seven feet in length, but the width remains at the initial four. The Welcome Center would appear in front of the loco and above the dock. The island will be very lush with foliage and very green. Only the bare rock work is shown in the sketch. There probably will be a natural rock spire to the left and totally separate from the island. Atop it will be a small gazebo. There will be a bridge of some sort over to it. 

Friday, August 24, 2012

No streamlining here!

Thought I'd post a few photos of an interesting project that I finished a few months ago. I might use this one also for the Last Resort. Only room for one at a time, but it would depend upon my mood, which I might run at any given time.

This one is from New Zealand and is covered in my new Teakettles book. Resin parts are available for anyone who might like to build one. It uses the Bachmann On30 Street Car motor block. My favorite motor arrangement.


The original was built with a Hudson auto frame and running gear. It was successful and another unit of similar design was fashioned soon after the first was delivered. This is a bag of resin parts that needs to be combined with a 1/24 scale plastic auto or truck frame and running gear. I used 1919 Olds parts for mine. The wooden parts of the body are actually styrene. The water tank is a plaster 55 gal. drum. How it works is beyond me. I copied the original arrangement, so the real thing worked somehow! Plans are in the new book.

Thursday, August 23, 2012

A little closer still...

Teakettles is in the process of being printed at last. I shot a few more photos to round out the documentation. Spell check done, but still some weird things do happen at times. The first 20 volumes will be signed and numbered and the price is $25.25 which includes Priority shipping in the US. It can be ordered through my web site and PayPal, or simply by sending me a check to; Tom Yorke, 210 Pitch Lake Ct, Roswell, GA 30076. 

Wednesday, August 8, 2012

Perhaps a little premature, but...

Teakettles, Dinkies & Critters is finally being put together and should be ready soon. Full of plans, B&W and color photos plus notes on many of my locomotive creations built over the years. Some rather normal looking while others are, well, not really normal looking! More info later when we get closer to actually printing the thing.
Tom

Friday, May 11, 2012

The Welcome Center.


Here are a few shots of the Welcome Center. There are a few more things that need doing yet before I can truly call it finished. It is BalsaFoam with cast resin parts of my own manufacture except for the St. Christopher figure. That is a commercial dollhouse part. It sits atop a cliff made from torn foam rubber. The stones are hand carved and the finish is stucco ( Spackling Paste). The doors are styrene built-up with cast bolt details applied. The roofing sheets are my own Spanish Tile resin castings. The window bars are cut from dollhouse gate sections and all else is pretty much carved from foam to be really light-weight. The patio tiles are styrene chips painted to look like tiles and grouted with Spackle. The steps are chips of foam coated in Spackle to represent stone and the palms are hand made.

Wednesday, May 9, 2012

Forum or Againstum?

It has been a little while now since I stared this blog. I was hoping it might turn into a discussion forum of sorts about Gn15 and associated issues. I have long not been able to post on the Gn15info site for some undetermined, strange reason and I started this site in hopes of airing my ideas and creations and looked forward to some discussions. I know times are lousy for a lot of us, but that is all the more reason to get lost in our hobby. There's a lot of things we cannot do or change right now, but we can create, build and discuss our models. Most of us have a stash of unbuilt kits and parts already on hand. We don't necessarily need to spend much or practically any money on projects unless there is a need for a special part or something. Let's get away from in front of the news on TV, forget about it and build something and have a little fun. Let's share our results too. 

Saturday, May 5, 2012

Welcome Center

Finally finished the first building on the tiny island of The Last Resort. Really a tiny structure that is only about 9' x 17' and that includes a walled patio! Everything must be small on the island. This structure sits right next to a cliff 24' above the ocean. There is a wooden dock below where the tiny launch drops off and picks up resort guests with a winding stone stairway up to the gate.

I will post some photos in a few days if I can. After it is "planted" in its location, it will need to be blended into the terrain. Next door will be the owner/operator's cabin. This will be a rather rough affair built from found materials and jutting out over the sea, as land is at a premium. On the other side of the Welcome Center will be the engine shed, such as it is, and the tiny fuel facility. A tiny storage track occupies the area immediately adjacent to the cabin on which can be stored the probably three pieces of rolling stock. As a guest steps out of the Welcome Center, she boards the little train immediately outside for the ride up the hill. 

Thursday, March 22, 2012

More on Cementos #3


Here are a couple of detail shots of the building of the saddle tanker. The pilot beams were made of styrene and carved to resemble wood. The coupler pockets are resin castings from another project. That's one reason why I cast things. You never know when they will come in handy again! The interior shows here. Most of the items are my own resin castings. The small fuel oil tank is on the left side of the cab with a low engineer's seat on the right. The steam gauge is a Cambrian styrene part.

I am working on a detailed article for this loco along with scale drawings to come soon.

Thursday, March 15, 2012

Work on the main island continues

Cementos #3 is now complete. The squat little 0-6-0T was bashed from a Bachmann On30 2-6-0. Nothing but the frame was used as usual. Everything else is either styrene or cast resin. Believe it or not, this loco is built from a photo of a real locomotive, manufacturer unknown. The main change I made was converting it to an 0-6-0 instead of the four drivers of the original. The boiler is a plastic tube and the square water tank was fabricated from styrene sheet. The cab is also styrene. Both pilot beams are carved from blocks of glued-up styrene to resemble wood. Two sanding boxes are mounted at the front of the tank and are linked to the cab by a long line. Ok, she isn't quite finished yet. You caught me! The sanding pipes need to be added yet.


The finish is to represent a pit engine that receives as little care as is necessary to keep it running. The color is a much faded and chipped blue. The lettering is dry transfer that has been painted and weathered over. There is a small oil bunker in the cab. This will be one of several Cementos locomotives needed. I am working on a 2-6-0 with tender and an outside frame 2-8-0T+T as well as a tiny diesel converted from an old steamer.

Tuesday, March 13, 2012

Saint Francis comes to the island.

A short progress report, but alas, no pictures yet. The patio area for the welcome center is well underway. The tiles are down and grouted as well as the three surrounding masonry walls. The end wall has a niche at the center and a figure of St. Francis has been installed. This is a really nice little sculpture for the dollhouse  modelers. It fits perfectly! The walls are rather run down and they will still need finish painting. They are currently undercoated in a white. I have one more small wall section to finish before the patio area is complete. Then it will be on to the main building; all 4x5 inches of it! I have made individual Spanish Tiles for some of the roof details and these cast perfectly in resin. These tiles are for detail rows and not complete roofing sections unless they are of other than flat, equal rows. I have a cast sheet for those areas. Once the final little wall piece is installed, I can add the iron gate. Dollhouse again!

Work continues on the boat that takes travelers from the big island to the tiny resort. Its been in dry dock for some time now. Paint and weathering has been applied and cushions are being manufactured from Super Sculpy. All that remains is some final details. Photos will come upon completion.

Wednesday, March 7, 2012

The Welcome Center

Very shortly it will be time to start work on the first structure on the island. It will be the Welcome Center. This is the first stop guests take when they arrive by boat to the island. Here is where they register for their stay and board the little railway for their circuitous trip up the mountain side. The structure is of the typical stone and brick style that is covered with stucco and has a tile roof. It was repurposed from the monastery registration building that had been there for seemingly,  eons. It has a little patio area with fountain and statue in a niche in the stucco wall. It is but a short, steep, walk up a stone stairway from the wooden dock. This is on the Gulf side of the island, so the water is not as rough as the Atlantic on the opposite one. This area also houses the shops with its primitive assortment of tools, fueling depot; a greasy spot of track, and the island's owner's house. A very short spur track angles off of the main here to store the other two pieces of rolling stock; a flat and a tiny box car or shed on wheels. As stated before, there was no extra room to store the lines first loco. It was not a very successful piece of machinery cobbled together by the proprietor, so it was dumped off the end of the shop track into the Gulf where it pokes its nose up for air. depending upon the tide.

This building will be made from BalsaFoam with my own cast resin Spanish Tile roofing. But first, I need to order some black foam for the rock work. All of the rock work will be made from this. No plaster will be used in an attempt to conserve weight.

Tuesday, February 28, 2012

Vertical Boiler Teakettle


Finally finished it! This is the little loco that will take guests up  the mountain to the resort. It is built over a Bachmann On30 Davenport. The parts are my own resin castings and a lot of styrene bits and pieces. The pump was built from bits of styrene as there wasn't anything on the market close to what I needed. Water is carried in the round tank up front while coal is in the bin under the seat. The piping is styrene and Plastruct pipe joints along with my own "joints" of nuts and thin styrene wafers from a paper punch. The water glass is a Precision scale 1/4" brass detail casting as are some of the valves. Its purely fictitious and home-built. Parts for this conversion will be available soon for those who may wish to build something similar.

The track work shows my new cast resin ties to slip over Micro Engineering ties once about 60% or so have been removed and re-spaced. The little bridge is one of many to be used on the line. Not heavy duty!

Saturday, February 25, 2012

A little more progress.

I've successfully assembled a small length of track with the new ties in place. They really change the look of the track greatly. I have worked this small length into a tiny bridge that I will use on the system. One of many, many bridges and trestles needed. I will post photos next week of this along with the completed vertical boiler teakettle.

Wednesday, February 22, 2012

Progress... of sorts

A little bit of progress has been made on the vertical boiler teakettle. All of the piping is finished including my own styrene water pump, hand operated! The paint and most weathering is done and the roof is in place. I have one more brace to finish. Those were nightmares! My eyes and hand coordination are not what they used to be.

I will shoot photos next week since I have the instruction booklet to finish for the dollhouse-size country store kit and will be doing the photography for that. The deadline for the show is March 2. It makes a great looking 1/2" scale wood store and although it is for the dollhouse market, there's no reason it couldn't be used as a railroad piece in large scale. Nice as it is, it just won't fit on the island of Grande Barbosa.

I've been toying with foam rocks of various sorts of late trying to figure out the way that suits me best. I am leaning more towards expanded urethane and fine floral foam, both covered in texture paint.

Now back to painting the engineer for the teakettle...

Monday, February 20, 2012

Corrections

I am painting the vertical boiler loco now but I am going to have to back track a little. One part needs to be redone and its already glued in place. Some careful surgery will be required. I debated doing this but I believe it really needs to be corrected. Photos will be postponed during surgery and recovery.

I had to make most of my own pipe connections and valves from plastic and resin nut castings. Cambrian Models valve handles worked very well. The driver also came out nicely. He is a reworked figure from New Zealand.

For the next two weeks I won't be able to work on The Last Resort as I have a miniatures show to prepare for on the second. Going to be difficult keeping my hands off of it for all that time!

Saturday, February 18, 2012

Ties that bind

I just cast up a few samples of the new, larger, rough-cut ties for the Micro Engineering track. Wonder of wonders, they work! No photos yet. I am busy painting a small section and will shoot photos sometime next week. Installed, they really change the appearance of the On30 track.

I am also assembling the piping on the vertical boiler steamer now. I hope to have some shots of it too next week. This will be the power for The Last Resort line up the 4% grade. It will actually be number 2; the #1, a not too successful unit, having been pushed off the end of the track into the ocean because there was no room to store anything that didn't work on the limited track work.

I hope next month I can start on the actual bench work before I forget what I want to do! Its all on paper, however, as most modelers know, when drawings on paper are transferred to three dimensions, nothing ever works like it did on that paper.

Friday, February 17, 2012

Under the palms

Here's a shot of the little Jung-style loco in some trial scenery. Lush, tropical greenery is interesting to make. There are companies that do a nice job in 1/32 scale or so, however, their offerings would be way too expensive with which to plant a layout. Some experimenting needs to be done. I used to work for an architectural model company when I was going to school and that is where I learned to make palms. The only problem with those is the fact they take so long to make properly. Plastic ones just don't cut it for me. The undergrowth is from pine branches at the faux greenery department of Michael's. These are OK if they are painted. They do not represent any specific flora, however, they kind of look the part and they are cheap. Other varieties of growth can be found at Michael's or the like and with a little careful snipping and coloring seem to work out quite well assuming you don't show your layout to a botanist! I'm still looking for hypsicantha though.

Thursday, February 16, 2012

The Last Resort

An Island Paradise
Chapter One

Somewhere out in the Caribbean Ocean, not too terribly far from Cuba, sits a tiny island paradise. The island is situated even more closely to Grande Barbosa, a much larger, but still pretty darn small spit of land that is now home to tourists who enjoy the sun and fun that an isolated island can provide.

Travel to the island of Grande Barbosa is either by boat or antique amphibian as there is no room for a landing strip. From the port, The Last Resort is just a short trip aboard a tiny boat. The island resort is reserved only for young ladies. No gentlemen allowed! The resort itself was resurrected from a monastery owned by a small group of monks that abandoned their sanctuary almost a Century before. It fell into ruin as one might expect, which was a rather simple accomplishment considering the time it sat abandoned. An enterprising gentleman moved onto the island and set about rebuilding the monastery into a small resort. He built a tiny 15" gauge rail line along the original dirt path leading to the top of the mountain where the monastery was located. Considerable work was involved and many trestles, bridges and otherwise flimsily supported track work was required for the trip. He also runs the boat service from the larger island to the resort. He made his resort available for the use and enjoyment of young women only,where they would be undisturbed by society and allowed to frolic as they may during their stay. He was a very good host as he kept a close eye on his guests: just to be sure all were having a good time!

The idea for The Last Resort was envisioned many years ago and has been developing in my head for all that time. Several false starts were scribbled on paper over the years, but nothing really "gelled" until recently. I finally figured it out? Everything seemed to fall into place at last.

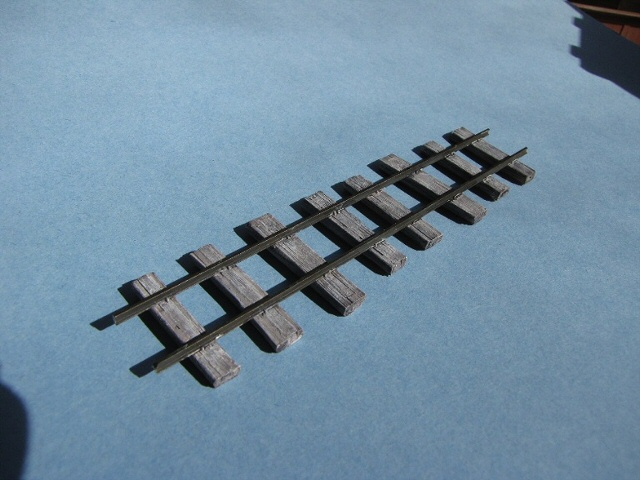
The railroad is in Gn15 and somehow it will be crammed into a base no larger (or smaller) than four by five feet. I have been working with foam and BalsaFoam for several years and decided that was the way I wanted to go. It must be somewhat portable. A model that large would be quite heavy if made the conventional way of wood and plaster. As much as could be made from lightweight materials is the name of the game. The rockwork, almost all of it, and even the structures will be built from lightweight foam materials. The Woodland Scenics layout system will also be utilized and foam rocks will fill in between. I have already used expanded urethane foam for structures an the main island and find it works beautifully. Structures in half inch scale tend to get really heavy very rapidly and that weight can be a problem. My structures weigh practically nothing! The material is strong and easy to work. The only drawback may be the fact that the material tends to be expensive. That's one reason I save every scrap. It all gets used somewhere. So much for history and philosophy: time to build.

Correction...

Let's make that five. Welcome Ray!

No photos today. I am going to get those ties molded and a few large pipe fitting parts done too. The Plastruct elbows are in so I can start the steam piping on the vertical boiler machine. Everything else is done and ready for finishing as soon as the piping is complete. I am anxious to get those ties in place to see what they look like painted and weathered. Now if I just had an extra pair of hands to help assemble the 4x5 wood frame... it shouldn't be too difficult though if I use corner blocks.

One of these days I will finish the latest water tank for the GB line. It is a hillside unit with large stone work retaining walls. The tank itself is a plaster casting representing steel sitting atop a stone and brick "shed". It will be offered as a kit soon.

Wednesday, February 15, 2012

Let's Celebrate!

Four members and counting! I have no idea how many we may collect, but no matter. Yesterday I experimented with some foam and carved a sample rock outcropping. Never done that before. Nope, never had a reason to. I am getting ready to start the base for The Last Resort and since it is all rock in the middle of the Caribbean somewhere, I need to be able to do that. T intend to do all of the rock carving from either foam or expanded urethane to cut down on weight. In fact, other than the bench work, which will be light lumber, everything else will be very light weight. All structures, and there will be numerous ones on the mountain top, will be urethane foam. No plaster at all. The track work will be Woodland Sceneics foam.

I just finished making five tie patterns in styrene. I will not hand lay the rails. Micro Engineering On30 track will be used along with one Pico electrofrog switch. Wiring will be kept real simple! The tie patterns are for this track. The stock smaller ties drop into slots in the new ones, cast in resin! This gives me uneven and rather crudely shaped ties without hand laying the track. I will remove about half of the stock ties before attaching the new "casings" over the remaining. I will still need a couple hundred ties I guess, but I can cast these from scrap as I do kits and things. I'll have a small pile of ties before I know it.  I will post a shot or two next week after I make the mold and some samples to assemble a short length of track as a test.

The first structure will start to take shape soon too. It will be the welcome center for the guests staying at the mountain top resort. More on that a little later.I picked up some half scale dollhouse supplies and details for this project. Actually, a length of 1/12 scale metal fencing will become cut up and used for window grills and a gate. I wish I could just sit and play all day on this, but I know I can't. Still, I need to make some time here and there somehow.

Tuesday, February 14, 2012

Beasts


New, larger power on the way to Grande Barbosa

I am working on several new pieces of power for the Grande Barbosa Island Railway. They are not really photo-ready as yet, but I will post a few in the works shots. One is a Heisler clone and is built upon an Athearn HO SW Diesel loco frame while the other beast is powered by two Bachmann On30 Street Car motor blocks. This one is a somewhat close copy of a real New Zealand logging loco. My unit is "powered" by a Rolls Royce engine from a 1/24 model kit I happened to be hoarding for years. Many detail parts for these units were cast in resin from my own patterns to make things easier for me. That way I only need to build something once!

The vertical boiler loco for The Last Resort island off the coast of Grande Barbosa, is nearing completion. I am just awaiting some pipe joints. When this one is finished I will post photos of her. She will be available as a resin parts conversion kit that uses the Bachmann On30 Davenport as a donor. This is a tiny loco and follows two prototypes somewhat in its design.

 The story of The Last Resort will begin pretty soon right here...