Thursday, March 22, 2012
More on Cementos #3
Here are a couple of detail shots of the building of the saddle tanker. The pilot beams were made of styrene and carved to resemble wood. The coupler pockets are resin castings from another project. That's one reason why I cast things. You never know when they will come in handy again! The interior shows here. Most of the items are my own resin castings. The small fuel oil tank is on the left side of the cab with a low engineer's seat on the right. The steam gauge is a Cambrian styrene part.
I am working on a detailed article for this loco along with scale drawings to come soon.
Thursday, March 15, 2012
Work on the main island continues
Cementos #3 is now complete. The squat little 0-6-0T was bashed from a Bachmann On30 2-6-0. Nothing but the frame was used as usual. Everything else is either styrene or cast resin. Believe it or not, this loco is built from a photo of a real locomotive, manufacturer unknown. The main change I made was converting it to an 0-6-0 instead of the four drivers of the original. The boiler is a plastic tube and the square water tank was fabricated from styrene sheet. The cab is also styrene. Both pilot beams are carved from blocks of glued-up styrene to resemble wood. Two sanding boxes are mounted at the front of the tank and are linked to the cab by a long line. Ok, she isn't quite finished yet. You caught me! The sanding pipes need to be added yet.
The finish is to represent a pit engine that receives as little care as is necessary to keep it running. The color is a much faded and chipped blue. The lettering is dry transfer that has been painted and weathered over. There is a small oil bunker in the cab. This will be one of several Cementos locomotives needed. I am working on a 2-6-0 with tender and an outside frame 2-8-0T+T as well as a tiny diesel converted from an old steamer.
Tuesday, March 13, 2012
Saint Francis comes to the island.
A short progress report, but alas, no pictures yet. The patio area for the welcome center is well underway. The tiles are down and grouted as well as the three surrounding masonry walls. The end wall has a niche at the center and a figure of St. Francis has been installed. This is a really nice little sculpture for the dollhouse modelers. It fits perfectly! The walls are rather run down and they will still need finish painting. They are currently undercoated in a white. I have one more small wall section to finish before the patio area is complete. Then it will be on to the main building; all 4x5 inches of it! I have made individual Spanish Tiles for some of the roof details and these cast perfectly in resin. These tiles are for detail rows and not complete roofing sections unless they are of other than flat, equal rows. I have a cast sheet for those areas. Once the final little wall piece is installed, I can add the iron gate. Dollhouse again!
Work continues on the boat that takes travelers from the big island to the tiny resort. Its been in dry dock for some time now. Paint and weathering has been applied and cushions are being manufactured from Super Sculpy. All that remains is some final details. Photos will come upon completion.
Wednesday, March 7, 2012
The Welcome Center
Very shortly it will be time to start work on the first structure on the island. It will be the Welcome Center. This is the first stop guests take when they arrive by boat to the island. Here is where they register for their stay and board the little railway for their circuitous trip up the mountain side. The structure is of the typical stone and brick style that is covered with stucco and has a tile roof. It was repurposed from the monastery registration building that had been there for seemingly, eons. It has a little patio area with fountain and statue in a niche in the stucco wall. It is but a short, steep, walk up a stone stairway from the wooden dock. This is on the Gulf side of the island, so the water is not as rough as the Atlantic on the opposite one. This area also houses the shops with its primitive assortment of tools, fueling depot; a greasy spot of track, and the island's owner's house. A very short spur track angles off of the main here to store the other two pieces of rolling stock; a flat and a tiny box car or shed on wheels. As stated before, there was no extra room to store the lines first loco. It was not a very successful piece of machinery cobbled together by the proprietor, so it was dumped off the end of the shop track into the Gulf where it pokes its nose up for air. depending upon the tide.
This building will be made from BalsaFoam with my own cast resin Spanish Tile roofing. But first, I need to order some black foam for the rock work. All of the rock work will be made from this. No plaster will be used in an attempt to conserve weight.
Tuesday, February 28, 2012
Vertical Boiler Teakettle
Finally finished it! This is the little loco that will take guests up the mountain to the resort. It is built over a Bachmann On30 Davenport. The parts are my own resin castings and a lot of styrene bits and pieces. The pump was built from bits of styrene as there wasn't anything on the market close to what I needed. Water is carried in the round tank up front while coal is in the bin under the seat. The piping is styrene and Plastruct pipe joints along with my own "joints" of nuts and thin styrene wafers from a paper punch. The water glass is a Precision scale 1/4" brass detail casting as are some of the valves. Its purely fictitious and home-built. Parts for this conversion will be available soon for those who may wish to build something similar.
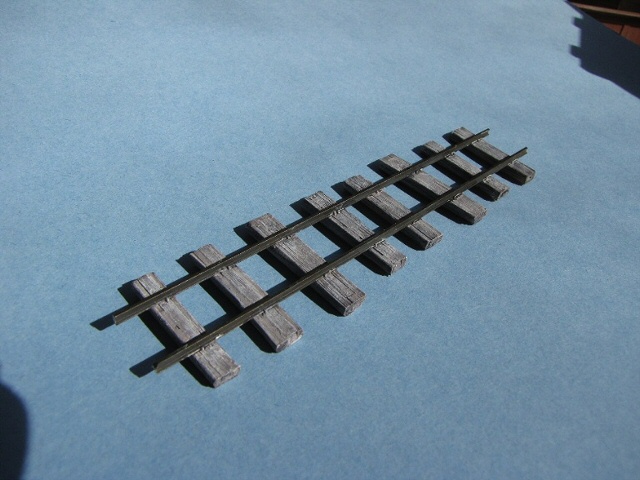
The track work shows my new cast resin ties to slip over Micro Engineering ties once about 60% or so have been removed and re-spaced. The little bridge is one of many to be used on the line. Not heavy duty!
Saturday, February 25, 2012
A little more progress.
I've successfully assembled a small length of track with the new ties in place. They really change the look of the track greatly. I have worked this small length into a tiny bridge that I will use on the system. One of many, many bridges and trestles needed. I will post photos next week of this along with the completed vertical boiler teakettle.
Wednesday, February 22, 2012
Progress... of sorts
A little bit of progress has been made on the vertical boiler teakettle. All of the piping is finished including my own styrene water pump, hand operated! The paint and most weathering is done and the roof is in place. I have one more brace to finish. Those were nightmares! My eyes and hand coordination are not what they used to be.
I will shoot photos next week since I have the instruction booklet to finish for the dollhouse-size country store kit and will be doing the photography for that. The deadline for the show is March 2. It makes a great looking 1/2" scale wood store and although it is for the dollhouse market, there's no reason it couldn't be used as a railroad piece in large scale. Nice as it is, it just won't fit on the island of Grande Barbosa.
I've been toying with foam rocks of various sorts of late trying to figure out the way that suits me best. I am leaning more towards expanded urethane and fine floral foam, both covered in texture paint.
Now back to painting the engineer for the teakettle...
I will shoot photos next week since I have the instruction booklet to finish for the dollhouse-size country store kit and will be doing the photography for that. The deadline for the show is March 2. It makes a great looking 1/2" scale wood store and although it is for the dollhouse market, there's no reason it couldn't be used as a railroad piece in large scale. Nice as it is, it just won't fit on the island of Grande Barbosa.
I've been toying with foam rocks of various sorts of late trying to figure out the way that suits me best. I am leaning more towards expanded urethane and fine floral foam, both covered in texture paint.
Now back to painting the engineer for the teakettle...
Subscribe to:
Posts (Atom)